Installation: Step #0
Posted by Pilkerton on Feb 14, 2016; 3:07am
URL: http://bluesaab-forum.90.s1.nabble.com/Installation-Step-0-tp223.html
Long time lurker, first time poster & newbie Saab owner here…
As part of Installation Step #0, I wanted to survey the cargo area of my 2000 Saab 9-3 hatchback to see where the elusive CD changer connector was situated relative to where the BlueSaab module will one day live. Doing so requires peeling back the trunk liner to get a better look.
The following instructions are what I had to do on my model, YMMV:
1) Remove the two bolts holding the luggage straps. This allows you to pop off the cover surrounding the trunk lock.
2) Remove the hand-tightened plastic nut near the left tail light.
3) Remove the 3 Torx screws securing the left rear speaker.
You can now gently pull back the liner to take a peek.
Note: Pay attention as you remove it, as you'll have to put it back, nicely tucking in the edges of the liner behind the trunk gasket.
Here's what mine looks like:
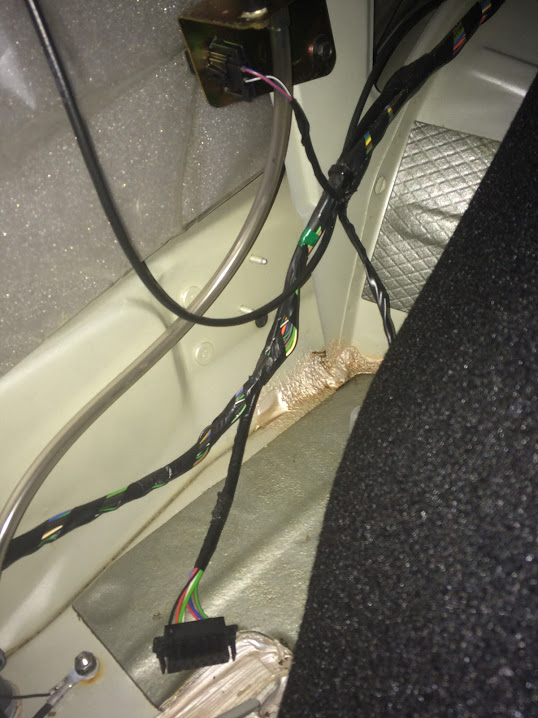
You'll see that the CDC cable is very short (BTW, that's the antenna motor visible at the top)
My questions for forum members:
Where did you install your BlueSaab Module? How did you mount it?
Please don't tell me you wrapped it in duck tape and it's just flopping around back there…
Do you remove the trunk liner whenever you need to flash new firmware or reset the module? Sounds like a royal PITA…
Does there exist a male-to-female extension cable that would allow the BlueSaab module to live in a more convenient locale?
Model: Saab 9-3 (9400)
Model Year: 2000
Body type: 5-door (5D) hatchback
Other: Stock CD player only, no CD changer installed
Blue Saab Version: PCB v3.3a mounted in trunk near the antenna
URL: http://bluesaab-forum.90.s1.nabble.com/Installation-Step-0-tp223.html
Long time lurker, first time poster & newbie Saab owner here…
As part of Installation Step #0, I wanted to survey the cargo area of my 2000 Saab 9-3 hatchback to see where the elusive CD changer connector was situated relative to where the BlueSaab module will one day live. Doing so requires peeling back the trunk liner to get a better look.
The following instructions are what I had to do on my model, YMMV:
1) Remove the two bolts holding the luggage straps. This allows you to pop off the cover surrounding the trunk lock.
2) Remove the hand-tightened plastic nut near the left tail light.
3) Remove the 3 Torx screws securing the left rear speaker.
You can now gently pull back the liner to take a peek.
Note: Pay attention as you remove it, as you'll have to put it back, nicely tucking in the edges of the liner behind the trunk gasket.
Here's what mine looks like:
You'll see that the CDC cable is very short (BTW, that's the antenna motor visible at the top)
My questions for forum members:
Where did you install your BlueSaab Module? How did you mount it?
Please don't tell me you wrapped it in duck tape and it's just flopping around back there…
Do you remove the trunk liner whenever you need to flash new firmware or reset the module? Sounds like a royal PITA…
Does there exist a male-to-female extension cable that would allow the BlueSaab module to live in a more convenient locale?
| Free forum by Nabble | Edit this page |